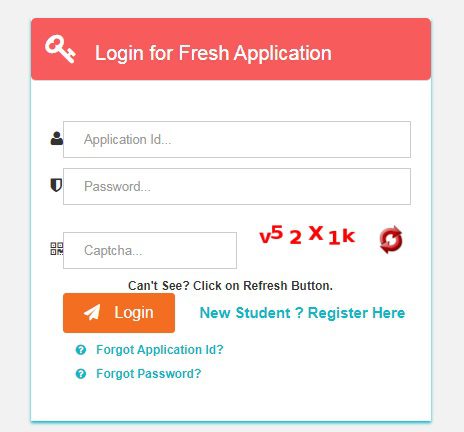
www.scholarships.gov.in 2024-2025 Login and Registration
For the New Institute User, Click on the ‘Fill registration Form’ at www.scholarships.gov.in at to fill the form details. This will lead to New Screen.
Students applying for scholarship for the first time (Fresh Students) need to “Register” on the portal as fresh applicant by providing accurate and authenticated information as printed on their documents in the “Student Registration Form”.
The registration form is required to be filled by parents / guardian of students who are below the age of 18 years on the date of registration.

Before initiating registration process, students / Parents / guardian are advised to keep the following documents handy:
1. Educational documents of student
2. Student’s Bank account number and IFSC code of the bank branch
Note: For pre matric scholarship scheme, where students do not have their own bank account, parents can provide their own account details. However, parents account number can only be used against scholarship applications for maximum two children.
3. Aadhaar number of the Student
4. If Aadhaar is not available, then Bonafide student certificate from Institute / School and
5. Aadhaar Enrolment ID and Scanned copy of Bank passbook
6. If Institute/School is different from domicile state of the applicant, then Bonafide student certificate from Institute / School.
Also Read : https //mybharat.gov.in/Yuva Registration
www.scholarships.gov.in 2024-2025 Registration
1. For the New Institute User. Click on the ‘Fill registration Form’ to fill the form details. This will lead to New Screen.
2. On Selecting the Fill Registration form the Screen 2 screen appears as above, the User then needs to enter the details and captcha. This Screen shows how to Validate the AISHE/DISE/NCVT code. After clicking ‘Submit’ successfully the Screen 3 will appear. Follow the below steps for Screen 2:
- Enter AISHE/DISE/NCVT code
- Refresh Captcha
- Enter Captcha
3. Click to Submit
After Screen 2 being successful, Screen 3 appears. In Screen 3, the INO details mentioned in the Grid (highlighted by Green) shows no data available because the Aadhar details are not entered or verified. For next steps, please click on ‘Continue with Aadhar verification’ and enter the details of Aadhar for validation. Follow the below steps:
- Please read the Notification. If the KYC form is already filled, then the same will be displayed in the below GRID. Then please follow point 2.
- Click on ‘Continue with Aadhar Verification’
After Screen 3 on clicking ‘Continue with Aadhar verification’ the next screen appears as Screen 4. In this screen the INO will enter all the details related to its Aadhar card for verification and validation. Follow the below steps and enter details for Aadhar Verification:
For Institute Nodal Officer (INO) details:
- Enter Aadhar
- Enter Name as in Aadhar card
- Enter Date of Birth
- Select Gender
- Enter Mobile
- Click on Submit
After Screen 5 the next screen appears as Screen 6 & 7. In these screens the INO will enter the details of Institute and verify the details for submission. Also, INO will upload a scanned copy of its Identity proof (as mentioned in below step). INO will also verify and check the details as linked in Aadhar for this NSP portal. Follow the below steps:
- Please read this Instruction
- Upload Scanned Copy of INO Identity proof (Identity proof can be any of Aadhar, Voter ID, license )
- Enter Institute Address
- Select State for Affiliated Board/University
- Select Affiliated Board / University
- Select Institute Nature
- Enter Total Student strength in the Institute
- Enter URL of Institute’s Website
- Enter Designation of INO
- Enter Official Email id of INO
- Enter Other Contact of INO
- Enter Designation of HoI
- Enter Official Email id of HoI
- Enter Other Contact of HoI
- Review all details and Submit
After Screen 7 the next screen appears as Screen 8, In this screen once all the details are entered by INO (i.e., the details of INO, HoI, Institute etc) this screen asks to validate the OTP of INO while registering the User. Follow the below steps to validate OTP details:
- After Submitting details, enter 5-digit OTP
- Click Confirm
After Screen 8 the next screen appears as Screen 9, In this screen the KYC form printout should be taken by INO and should be attested (signed and stamp) by the HoI. INO should also paste a passport size photograph on the form as in the mentioned section. Attested copy of KYC will then be scanned and uploaded on the NSP portal. Post this HoI will approve the KYC form and then forward it to DNO or SNO for approval. Laos note that the INO will submit the original attested copy to the DNO and will keep a photocopy of attested KYC in school for record purpose. Follow the below steps:
- Read the Instruction as
- Take the printout of the KYC form attested by Below screens will showcase the KYC Form template

Important Note:
1. After submitting the application, the default login id and password to log into NSP portal will be sent to the provided mobile number. In case the password is not received, the option for forgot password at login page shall be used.