How do I create a Samsung Account on my Smart TV?
To start enjoying all the advantages offered by Samsung Accounts, the first thing you must do is create an account, either from your mobile or from the Samsung account website.
You can register for a Samsung account using any Samsung mobile device or from the Samsung website.
Register from a Samsung mobile device
If you want to register with a Samsung mobile device, follow these steps:
Step 1. Run ‘Settings’ from your apps screen and tap on the ‘Accounts and backup’ option.
Step 2. Click on ‘Manage accounts’.
Step 3. At this screen, tap the ‘Add account’ option.
Step 4. Choose the option that you want, then read and agree to the Terms and Conditions Agreement by checking the consent icon.
Step 5. Enter your personal information and tap the ‘Create account’ button.
Step 6. You will have to set up the Two-step verification, so you must register your phone number. When you enter it, tap the ‘Ok’ button.
Step 7. The last step is validating your email. Tap the ‘Go to inbox’ option and validate it to start enjoying your Samsung account.
Register from the Samsung website
If you want to register for an account on the Samsung website, follow these steps.
Step 1. Visit the Samsung account website and select “Create account”.
Step 2. Read and agree to the Terms and Conditions Agreement by clicking the ‘Agree’ option.
Step 3. Enter your personal information and set up a Two-step verification.
Step 4. When you enter all the information and complete the Two-step verification, you only need to validate your email to start using the Samsung account.
Also Read : How do I Activate TNT Drama on FireTV
How to Sign in to a Samsung account from Samsung Smart TV?
1. Select Settings.
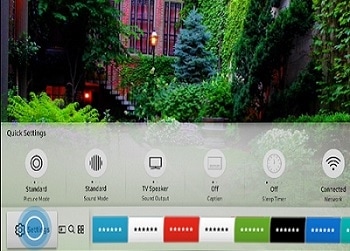
2. Select General.
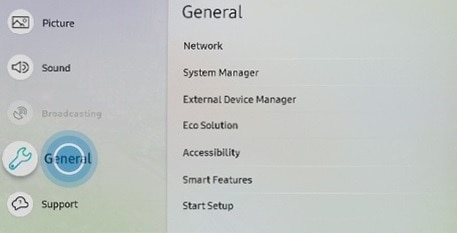
3. Select System Manager.
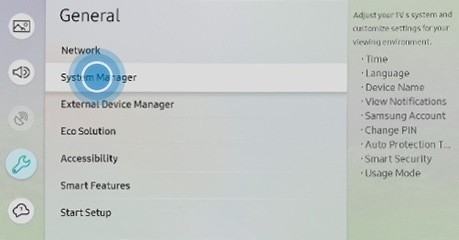
4. Select Samsung Account.
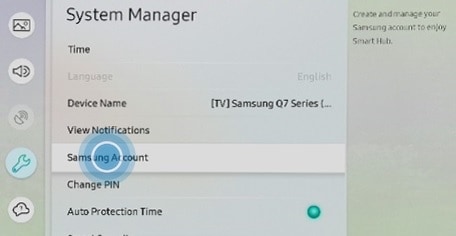
5. Click on Sign In.
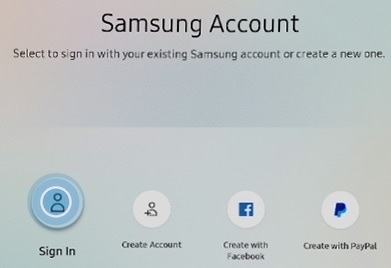
6. Enter your Samsung account email address and then click on Next.
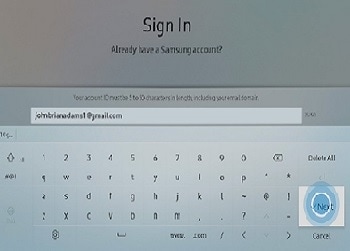
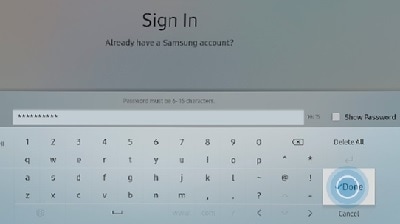
7. Enter the password and then select Done.
How to add my TV to the SmartThings app
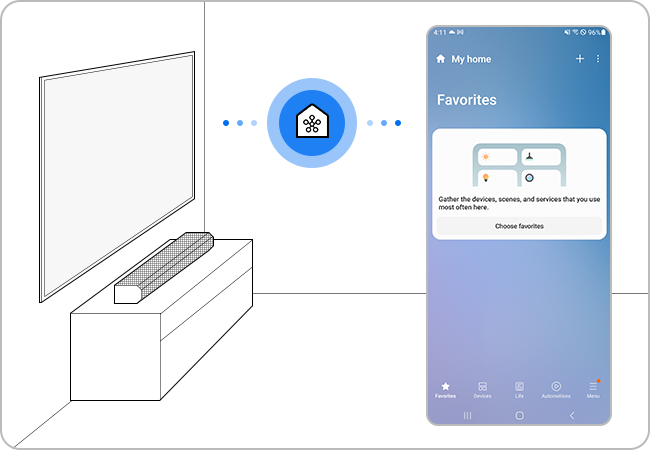
By registering your TV in the SmartThings app, you can conveniently control various functions without directly operating the TV or using the remote control. It is also great for enjoying vivid content by easily connecting it to other devices in the house, such as a Soundbar or Bluetooth headphones. Enjoy your Samsung Smart TV smarter with the SmartThings app.
What if you leave the house and forget to turn off the TV or if you want to control the TV in the living room from another room? The SmartThings app is a very smart solution to conveniently control a variety of IoT devices in one place. Smart TVs can also be conveniently managed anytime and anywhere through the SmartThings app.
Also Read : https //inys indiana.edu/school-survey
Make sure the requirements for connection
Before connecting your mobile device to your TV, ensure that the following requirements have been met first.
Check your mobile device operating system
- The SmartThings app is compatible with phones running Android 8.0 or higher, and iOS 12.0 or higher.
Connect your mobile device to the same network
- Each device must be connected to the same Wi-Fi network.
- On your smartphone: Tap Settings > Connection > Wi-Fi > Select a router to connect to.
Install the SmartThings app
- Download and install the SmartThings app from the app store.
- To find the app, use the keyword SmartThings.
Set up your Samsung Account
- You must sign into a Samsung Account before using the SmartThings app.
- The smartphone and Samsung TV need to be logged into the same Samsung Account to pair.
- If you have a Samsung smartphone, you can add your Samsung Account in the setting app of your smartphone. Then, it will automatically sign into your Samsung Account.
Also Read : Apple TV Activation Failed
Why do I get an error when signing into my Samsung account
1. If you encounter an error message such as “An error occurred during an SSL connection” or “Sign in failed due to difference between current time and device”, check the date and time settings on your device. For security reasons, Samsung accounts require the date and time settings to match the actual date and time.
Make sure you have a reliable Wi-Fi or mobile data connection and that the number is not blacklisted on your device if you are not receiving a verification code through text message.